





How to Measure Non Standard Art for Made to Measure Picture Frames
Commissioning made-to-measure picture frames for odd-shaped or bespoke pieces requires exact precision from the outset to avoid costly remakes and permanent damage to valuable artwork. Standard factory-cut mounts rarely accommodate non-rectangular canvases, textiles, or irregular 3-dimensional items without distorting the finished aesthetic. By mastering exact measurement techniques, picture framers and artwork owners ensure that custom picture framing fits the precise artwork dimensions while providing adequate clearance for expanding materials.
This comprehensive guide outlines practical, repeatable steps to quantify complex profiles, assess rebate depth requirements, and account for natural material expansion. You will learn how to calculate border allowances, select appropriate glazing clearances, and communicate physical dimensions to bespoke framing workshops accurately. Understanding these foundational technical details protects sensitive display items, preserves structural integrity, and delivers a flawless presentation for any irregular piece on display in residential or commercial settings across the UK.
Measuring non-standard or irregular artwork for custom picture framing presents immediate physical challenges, as conventional measuring tapes fail to capture subtle curvature, distorted corners, or uneven border edges. When initial artwork dimensions are recorded incorrectly, bespoke frames suffer from poor fit, leaving unsightly gaps around edges or physically pinching delicate organic fibres under tension.
Inaccurate initial site surveys and manual dimensional errors account for up to 22% of custom framing remakes across UK workshops, resulting in avoidable waste, extra labour, and project delays. According to Fine Art Trade Guild guidelines, incorrect housing depth or insufficient edge clearance causes irreversible paper cockling and moisture trapping that degrades 100% of unsealed paper substrates over a 5-year period.
Adopting systematic, multi-point measurement protocols alongside rigid conservation board templates eliminates guesswork before cutting expensive timber moulding or specialist glazing panels. Modern digital callipers and precise rebate depth calculations ensure that made-to-measure picture frames accommodate non-standard items cleanly, securely, and cost-effectively every time.
KEY TAKEAWAYS
- –Multi-point measuring protocols accurately capture subtle variations along irregular artwork dimensions, preventing structural pinching, alignment errors, and frame fitting failure.
- –Calculating precise rebate depth guarantees adequate housing space for multi-layer mountboards, structural backing panels, and protective glazing without applying pressure to sensitive artwork.
- –Combining rigid physical templates with verified digital calliper data eliminates communication errors when ordering bespoke made-to-measure picture frames from specialist framing workshops.
Need Specialist Advice on Made to Measure Picture Frames?
Speak to our technical team today for tailored specifications, regulations compliance, and practical support.
Essential Tools Needed Before Measuring Unusually Shaped Artwork
Rigid Measuring Instruments for Accurate Dimensions
Precision framing relies on rigid measuring tools that will not flex or bow during assessment. Using a high-grade metal tape measure alongside a firm ruler ensures accurate edge-to-edge readings across irregular profiles.
Flexible fabric tapes stretch over time and introduce unacceptable margins of error when calculating bespoke frame cuts. For non-standard artwork, a steel metal tape measure provides the structural rigidity needed to span wide gaps without bending. Complementing this with a clear firm ruler allows you to check tight corners, bevelled mounts, and localised details down to 1 millimetre. Always record metric measurements to align directly with standard UK picture framing machinery and custom moulding specifications. Using imprecise tools often leads to misfitting mounts that cost up to £100 to replace.
Stable Work Surfaces and Protective Materials
A clean flat surface is essential to support delicate or unusually shaped pieces while you take measurements. Placing your artwork on a smooth table lined with acid-free tissue paper prevents physical abrasion during inspection.
Unusually shaped pieces, such as circular canvases, hex panels, or 3-dimensional mixed media, require complete stability before taking any dimensions. Laying the piece flat prevents gravity from warping flexible mounts or distorting natural contours during handling. Follow this quick 3-step surface setup routine before measuring your artwork
1. Clear a firm table that is at least 20% larger than the widest points of your artwork.
2. Cover the flat surface with a clean sheet of acid-free mounting board or soft cotton fabric.
3. Place the artwork face up and verify that 0 structural elements overhang the protective boundary.
Recording Tools and Precision Accessories
Flexible tracing paper and a fine lead pencil allow you to map complex perimeter shapes onto a flat template. Creating an accurate 1-to-1 scale template ensures your picture framer can replicate irregular curves without error.
When dealing with non-rectilinear shapes, standard linear measurements often fail to capture organic curves or asymmetrical angles. Laying heavyweight tracing paper directly over the piece lets you trace the exact silhouette using light pencil strokes. You can then mark key dimensions directly onto the sheet, including maximum height, maximum width, and diagonal points across 2 perpendicular axes. This physical blueprint eliminates guesswork, saving you from expensive re-trimming costs that can easily reach £50 or more for specialist made-to-measure frames. Keep a sharp HB pencil, a digital caliper for edge thickness, and low-tack tape ready to secure your template without leaving adhesive residue.
How to Measure Circular and Oval Artwork for Custom Picture Frames
Establishing the Maximum Diameter for Circular Art
Measuring circular art requires taking multiple point-to-point readings across the absolute widest section of the piece. You must record the highest measurement to ensure the picture mount aperture does not pinch or obscure the work.
Because paper, board, and canvas can distort during the creation process, circular art rarely forms a perfectly uniform geometric shape. To capture the true dimensions accurately, follow this 3-step inspection sequence.
1. Place the artwork flat on a clean, hard surface and lay a rigid steel rule directly across the centre point.
2. Rotate the ruler systematically around the face to measure the span across 6 different angles.
3. Record the largest figure in millimetres to establish your true maximum diameter.
Calculating Major and Minor Axes for Oval Pictures
Oval pictures depend on accurate measurements along both the vertical major axis and horizontal minor axis. These 2 perpendicular dimensions dictate the exact curvature required for custom-cut mounts and frames.
Unlike standard rectangular items, ovals feature constantly shifting curves that demand precise structural framing. To map these dimensions, place the artwork onto a sheet of heavy paper and mark the outermost top, bottom, left, and right edges with a sharp pencil. Measure the straight distance between the vertical marks to find the major axis, then measure between the horizontal marks to find the minor axis. Ensure these 2 lines intersect at a 90-degree angle. If the original artwork shows subtle hand-cut variations, taking 3 separate height and width checks across the surface ensures your custom frame covers all physical irregularities.
Sizing the Picture Mount Aperture Correctly
A picture mount aperture must be cut approximately 3 mm to 5 mm smaller than the artwork dimensions. This slight overlap prevents the image from falling through the opening while concealing uneven edges.
When securing bespoke framing for non-standard shapes, always provide the framing technician with the actual piece dimensions alongside your desired mount opening size. Framing workshops rely on high-precision computerised mount cutters to recreate smooth circular borders and balanced oval curves. Deducting 3 mm from your total maximum diameter or axial spans leaves a 1.5 mm border lip on all sides. This extra coverage gives you sufficient mounting area to secure the image with acid-free tape while preventing light gaps around the border.

Measuring Deep Canvases and Three Dimensional Items
Calculating Total Artwork Thickness
Accurately measuring the artwork thickness ensures your subject fits flush within the frame profile without pressing against the glazing. You must measure the deepest point of your object using a firm ruler or digital calliper to determine the required frame depth.
When dealing with heavily textured paintings, relief prints, or mounted objects, uniform depth is rarely guaranteed. You must identify the thickest section of the piece to avoid glass contact, which can cause condensation damage or structural pressure over time.
Follow this 3-step inspection sequence to record accurate structural depth
1. Place the item on a flat, clean surface and locate the highest point of the material.
2. Hold a rigid steel rule vertically against the edge, measuring from the surface to the top peak.
3. Add a 3 mm clearance margin to your total depth figure to allow proper breathing space behind the glass.
Assessing Rebate Height for Stretched Canvas
A stretched canvas requires a frame with a rebate height that comfortably accommodates the wooden stretcher bars. Matching the internal depth of the moulding to your canvas prevents the rear structure from protruding awkwardly from the wall.
Standard frame profiles often feature shallow lip recesses designed for thin paper prints or card mounts. When framing a stretched canvas, the rebate height must equal or exceed the total depth of the timber frame and fabric fold combined. If the canvas depth exceeds the rebate, the canvas will project past the back of the frame, preventing the moulding from sitting flat against the wall face. For canvas work, measure all 4 corners, as hand-wrapped corners often add 2 mm to 4 mm of extra bulk compared to the central edges.
Selecting a Shadow Box Frame for Objects
Choosing a custom shadow box frame allows 3D items to sit safely behind protective glazing with adequate clearance. This deep profile creates an enclosed pocket that preserves delicate materials while providing a clean border.
For three-dimensional memorabilia such as medals, sports shirts, or ceramic tiles, depth measurements dictate the entire moulding choice. A shadow box frame uses internal spacer strips to hold the glass away from the surface of the item. To calculate the necessary internal frame depth, sum the precise depth of your object, the thickness of any backing board, and a 5 mm safety gap. This precise approach keeps the display secure, grey dust seals tight, and the finished presentation perfectly proportioned.
Factoring in Picture Mounts and Edge Overlaps
Calculating the Exact Aperture Size
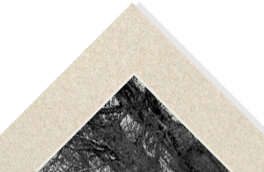
A picture mount board must be cut slightly smaller than the physical artwork to prevent the edges from slipping through the window opening. Subtracting 3 mm to 5 mm from both the width and height of the piece ensures a secure fit without obscuring key subject matter.
When dealing with non-standard art, precise window sizing prevents unsightly gaps while keeping the paper firmly secured behind the matting. The inner window of the picture mount board, known technically as the aperture size, physically holds the artwork in place. If you measure the aperture size to the exact dimensions of the image, the paper will simply fall through the window during mounting. A standard 3 mm overlap along every edge creates a clean border that easily covers trimmed or uneven paper edges. For thicker media such as hand-made rag paper or textured cotton sheets, increasing this reduction to 5 mm provides extra tolerance. Always check where artist signatures or edition numbers sit on the paper to avoid covering critical details.
Accounting for the Frame Lip Overlap
The internal rebate of a moulding features a frame lip overlap that prevents the picture frame glass and backing assembly from falling forward. This architectural lip typically covers 5 mm to 7 mm of the outer edge of your mount or unmounted artwork.
Framers rely on this internal rebate lip to hold the entire framing sandwich securely inside the wooden profile. When you order a made-to-measure frame, the external dimensions of the picture mount board must match the full internal rebate size, not just the visible glass area. The picture frame glass sits directly on top of the mount, locked neatly behind this internal overhang. If you omit the frame lip overlap from your initial calculations, the visible area of your picture mount board will look narrower than intended. A standard 50 mm mount border will show approximately 43 mm to 45 mm of visible board once seated inside the profile frame.
Measuring Steps for Perfect Mount Alignment
Following a structured measuring sequence eliminates costly trimming errors when sizing non-standard paper for custom framing. Taking precise measurements at 3 distinct points across the artwork protects against paper skewing and uneven borders.
1. Measure the maximum width and height of your artwork across 3 separate points to identify any paper expansion or manufacturing distortion.
2. Deduct 3 mm from both the total width and total height to establish the final aperture size for your picture mount board.
3. Add your desired outer border width multiplied by 2 to the aperture dimensions, ensuring you include an extra 5 mm for the frame lip overlap rebate.
Entering Your Custom Measurements Online Correctly
Selecting Units and Entering Artwork Dimensions
Inputting precise figures into an online platform prevents costly fitting errors when ordering bespoke framing online. You must select your chosen unit of measurement first and input the exact size of your artwork without adding any extra tolerances yourself.
When using an online frame builder like the one at Frames Express, always select millimetres as your primary unit of measurement. Centimetres or inches can lead to rounding mistakes that ruin the fit of a bespoke frame. Enter your exact picture dimensions into the web-based tool without adjusting the figures to compensate for mount borders or frame rebates. Professional picture framers use high-precision cutting equipment set strictly in millimetres, so providing raw, unadjusted figures ensures total accuracy. If your artwork measures 347 millimetres by 523 millimetres, type those 2 numbers straight into the software.
Accounting for Manufacturing Tolerances and Mount Borders
Professional framers automatically apply necessary internal allowances during production to ensure your artwork fits perfectly inside the rebate. Entering exact picture dimensions into the online frame builder guarantees the factory cuts the mount window slightly smaller to prevent the piece falling through.
To ensure your submission is entirely accurate before sending it to the workshop, follow this 3-step verification process.
1. Measure the exact picture dimensions across 3 separate points on both the horizontal and vertical axes using a rigid steel tape.
2. Key these exact millimetres directly into the Frames Express tool without subtracting any width for mount overlaps or frame lips.
3. Check that the digital preview displays a 2 millimetres overlap around all 4 edges, securing your artwork cleanly behind the mount card.
By relying on the automated calculations built into the online frame builder, you eliminate guesswork. The software automatically recalculates the external size of the moulding and the internal window cut-out, keeping your artwork 100% secure.
Verifying Specifications in Your Digital Summary
A thorough final review of your digital order summary stops simple transposition errors before your custom frame enters production. Verifying width, height, and mount border options ensures the workshop manufactures a frame tailored precisely to your piece.
Before clicking through to payment, cross-examine the basket list against your physical notes. Check that you have not accidentally swapped the width and height values, as landscape and portrait orientation shifts alter the hanging hardware placement. Confirm that any chosen mount options reflect your intended border thickness, typically 50 millimetres on all sides for standard displays. Reviewing these key metrics takes under 2 minutes and guarantees that your custom order arrives ready for immediate assembly.
Frequently Asked Questions around Made To Measure Picture Frames
How Do You Measure Round or Circular Artwork for a Square Made to Measure Picture Frame?
You must measure the widest diameter of the circular artwork using a firm steel tape measure and add 2 mm to 3 mm for clearance. This measurement gives you the required width and height dimensions for a square made-to-measure picture frame.
If you intend to use a picture mountboard with a circular aperture, you should record the exact overall diameter of the artwork. The custom framing process will automatically deduct 6 mm in total so that the circular mount window overlaps the edge of the image by 3 mm on all sides.
What Clearance Allowance Should You Add to Artwork Measurements for Made to Measure Picture Frames?
You should add 2 mm of total clearance to your exact artwork dimensions so that the piece fits easily into the rebate of the frame. Picture framers usually build this 2 mm allowance into the internal dimensions of made-to-measure picture frames automatically when you provide exact art sizes.
However, if you order a frame based on exact board dimensions without a mount, confirming this 2 mm clearance tolerance is essential. It stops paper items from bowing or buckling when local humidity levels change throughout the year.
How Do You Measure Irregularly Shaped Textiles or Canvas Prints for Made to Measure Picture Frames?
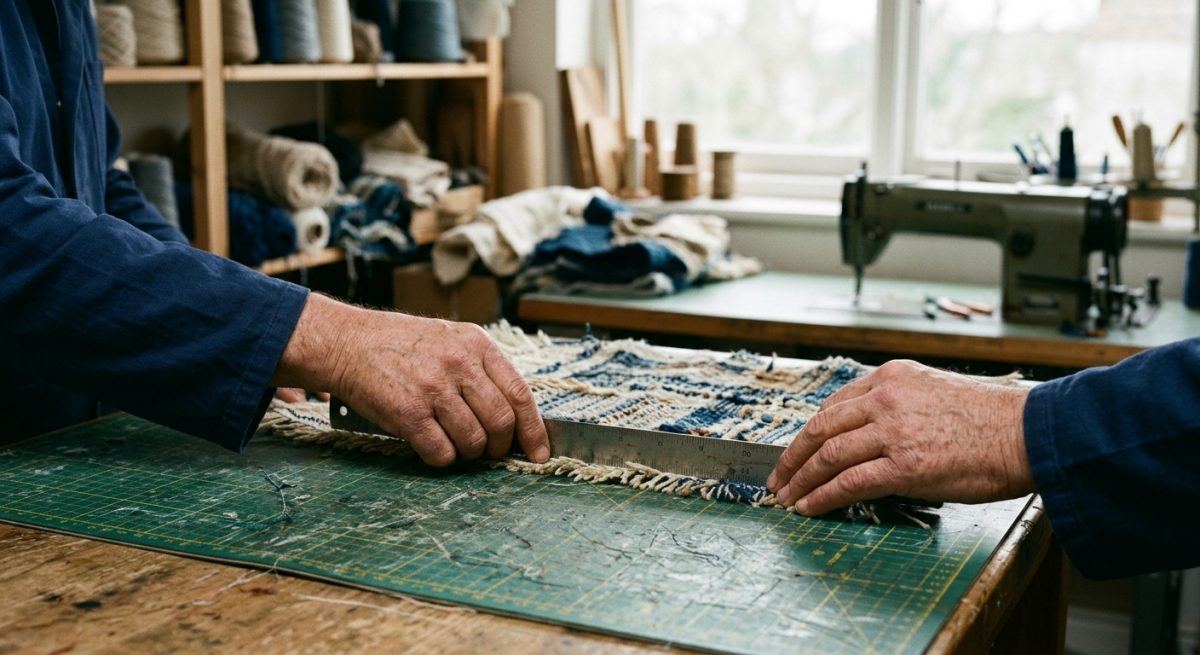
You measure the furthest outer points of the textile along both horizontal and vertical directions to define the overall rectangular size. Place the item flat on a clean table and use a heavy steel rule to find the maximum span across the width and height.
You must also measure the depth of any stretched canvas or raised embroidery at its thickest section. Selecting a made-to-measure picture frame with a rebate depth at least 2 mm deeper than the artwork ensures the backing board sits flush against the frame rear.
Should You Measure the Picture Mount Opening or the Overall Frame Size?
You should always measure the exact size of the artwork itself rather than the mount opening or external frame dimensions. The online ordering system for made-to-measure picture frames automatically calculates the correct mount window size by applying a 3 mm overlap along each edge.
Providing the true dimensions of your picture ensures the finished mount and frame fit together perfectly. This prevents the mount cutter from trimming away crucial details or leaving unwanted gaps around the edges of your image.
How Do You Measure Artwork That Contains 3D Elements for Made to Measure Picture Frames?
You must measure the maximum length, width, and depth of the artwork at its thickest point to choose a deep-box made-to-measure picture frame. Lay the object flat and place a hard ruler vertically against the highest point to measure total depth in millimetres.
You must select a frame depth that offers at least 5 mm of additional space above the item. This extra space ensures that the glass does not press against the surface of the artwork, which prevents long-term surface damage and condensation sticking.
How Do You Check That an Odd Sized Piece of Paper Is Square Before Ordering a Frame?
You measure both diagonal distances from opposite corner to corner across the paper to check whether the 2 figures match. If the 2 diagonal measurements differ by more than 2 mm, the sheet is not square.
In this situation, ordering a made-to-measure picture frame with a custom mount helps hide uneven paper edges behind a perfectly rectangular window. The mount covers the irregular outer edges of the paper while keeping the frame square on your wall.
Why Must You Use a Rigid Metal Tape Measure for Custom Framing Dimensions?
You must use a rigid steel tape measure because flexible fabric tapes stretch over time and cause measurement errors of up to 4 mm. Accurate measurements are essential when manufacturing made-to-measure picture frames to a tight tolerance.
A steel tape lays flat along artwork edges, giving reliable millimetre readings that prevent costly remakes. Using precise measuring tools ensures that picture mounts and frame rebates match your items on the 1st attempt.
How Much Overlap Does a Custom Mount Window Require for Non Standard Paper Sizes?
A custom mount window requires an overlap of 3 mm on all 4 sides of the artwork to hold the paper safely behind the board. This 3 mm reduction along each side prevents the print from falling through the opening when secured with picture-framing tape.
When measuring non-standard art, simply enter the complete picture dimensions into the ordering tool. The frame builder applies the 3 mm reduction automatically during the production stage.
How Do You Measure Odd Sized Panoramic Prints for Made to Measure Picture Frames?
You measure the total horizontal width and vertical height of the print at 3 separate locations along each side using a steel ruler. Long panoramic prints often suffer from slight paper distortions or uneven trimming during production.
Recording the largest of the 3 measurements for width and height guarantees that the panoramic made-to-measure picture frame will accommodate the entire print. This step prevents paper pinching once the backing board is secured in place.
What Unit of Measurement Is Best when Ordering Made to Measure Picture Frames in the UK?
You should always supply measurements in millimetres to achieve maximum precision and avoid rounding errors during frame cutting. UK custom framing workshops work strictly in millimetres to craft made-to-measure picture frames.
Converting measurements from inches or centimetres introduces small fractional errors that accumulate across the frame construction. Measuring directly in millimetres guarantees an exact fit and eliminates confusion during manufacture.
Ready to Discuss Your Made to Measure Picture Frames?
Get in touch with our specialists today for detailed site guidance, technical specifications, and a quotation tailored to your requirements.

