



How to Measure for Photo Mounts Without Making Sizing Mistakes
Article Overview
Measuring artwork for display in residential or commercial properties often presents unexpected technical hurdles, leading to misaligned displays, cropped images, and wasted materials. This comprehensive guide breaks down the core principles of framing geometry to help property owners, interior designers, and picture framers calculate exact dimensions with complete confidence. You will learn the fundamental distinctions between outer frame size, inner window openings, and standard border allowances across various print styles. By mastering key concepts such as the photo mount aperture size, overall Mountboard thickness, and corresponding Frame Width requirements, you can eliminate guesswork entirely. The text provides clear mathematical formulas, practical step-by-step guidance, and professional trade tips to ensure your prints fit perfectly every single time. Whether you are fitting bespoke artwork into off-the-shelf frames or designing custom displays from scratch, understanding these baseline measurements prevents expensive re-ordering mistakes and guarantees a clean, high-quality finish for any wall space in 1 simple process.
Sourcing bespoke framing for high-value artwork or residential property displays frequently leads to frustrating sizing errors due to overlapping terminology and miscalculated dimensions. Property owners regularly struggle to reconcile the actual physical print size with the internal window cut-out and the required outer dimensions of the finished display.
Inaccurate measurements mean that up to 18% of custom framing components are discarded or re-ordered due to minor mathematical slips that leave prints sagging or overlapping improperly. Following Fine Art Trade Guild standards is essential, as an incorrectly specified photo mount can pinch paper stock, warp under ambient humidity, or permanently ruin expensive interior visual installations.
Adopting systematic measuring practices and understanding core technical terminology allows you to order precision components that assemble cleanly on the 1st attempt. Modern digital cutting techniques rely on exact millimetre inputs, ensuring your chosen mountboard and overall frame width align perfectly with your visual display goals.
KEY TAKEAWAYS
- –Accurately calculating the precise aperture size requires deducting 3 mm to 4 mm from your artwork dimensions so the print stays securely positioned behind the window without slipping through the opening.
- –Selecting a premium acid-free mountboard protects valuable physical artwork against atmospheric pollutants while providing a balanced visual border within the chosen external Frame Width.
- –Standardising your measuring routine using metric millimetres rather than imperial units reduces sizing mistakes by over 90% across complex multi-frame gallery wall layouts.
Need Specialist Advice on Photo Mounts?
Speak to our technical team today for tailored specifications, regulations compliance, and practical support.
How to measure the photo aperture overlap to prevent image drop
Calculating Standard Overlap Allowance
Subtracting a standard overlap from your print dimensions prevents the artwork from falling through the window mount. A standard 3 mm reduction on each edge creates a secure lip that holds your photo print firmly behind the board.
When you order or cut a mount, making the opening match the exact dimensions of your image guarantees failure. The picture will simply pass straight through the cut window, leaving no surface area for mounting tape to grab onto. To establish the correct aperture size, you must subtract at least 3 mm to 4 mm from all 4 sides of your paper boundary.
For a 200 mm by 300 mm photo print, this means specifying an inner cut window of 194 mm by 294 mm. This targeted 3 mm overlap ensures that the mount board overlaps the image edges cleanly, concealing any uneven white borders while securing the print safely in place. If your picture features essential details near the very edge, reduce your margin slightly, but never clear less than 2 mm of structural board surface.
Securing Prints With Acid Free Tape
Correct mounting technique relies on fixing the top edge of your print while leaving the remaining sides free to expand. Applying T-hinges made with acid free tape secures the image without risking surface buckled paper or adhesive staining over time.
Improper tape application causes long-term structural failure, leading to image drop inside the frame. Follow this simple 3-step hinge process to keep your print suspended correctly.
1. Lay the picture face up and apply 2 short strips of acid free tape vertically along the top back edge, letting 5 mm of adhesive extend above the paper.
2. Place your mount board face down over the print, aligning the picture window carefully to maintain your calculated Overlap on all sides.
3. Secure the exposed tape flaps to the back of the mount using horizontal anchor strips to create a flexible T-hinge system.
Checking Aperture Dimensions Before Cutting
Measuring your physical print twice using a steel rule ensures your final window cutout matches your precise specifications. Comparing the actual paper boundaries against your target aperture size eliminates costly miscuts before you slice into the board.
Paper sizes frequently vary by 1 mm or 2 mm from printed manufacturer guidelines due to trimming variations during manufacturing. Using a rigid steel ruler, measure the exact height and width of your printed image rather than trusting the listed paper dimensions on the packaging.
Always record your physical measurements in millimetres to maintain precision across the entire layout. Subtract your chosen 6 mm total width allowance and 6 mm total height allowance from these recorded figures. This accurate calculation guarantees that your picture sits square, remains flat, and never drops out of sight behind the frame opening.
Calculating outer photo mount dimensions for existing picture frames
Measuring Internal Frame Rebates Accurately
To find the exact outer dimensions for an existing picture frame, measure the back opening where the glass sits rather than the front window. This measurement represents the glass size, which dictates the maximum length and width for your mount board.
When sourcing new board inserts for older frames, follow this simple 3-step inspection routine to collect exact data.
- Remove the backing board and glass safely from the main structure.
- Use a rigid steel tape measure to record the internal height and width of the structural Rabbet lip in millimetres.
- Check the dimensions across 2 different points per side to account for subtle frame warping.
Never rely on measuring the visible artwork display window from the front of the frame. The inner lip covers approximately 5 millimetres to 7 millimetres of the glass edge on all 4 sides, meaning front-facing measurements will always produce undersized boards.
Accounting for Clearance and Fitting Tolerances
Subtracting 2 millimetres from the total internal width and height prevents the board from buckling inside the frame recess. This small allowance compensates for standard board expansion caused by changes in ambient room humidity.
When ordering custom mounts, accurate sizing prevents tight corners that force paper to bow outward under pressure. Wood framing moves continuously throughout the year, expanding during humid summer months and contracting during dry winter spells. A tolerance cut of 1 millimetre along each edge gives the core card enough physical room to float naturally within the channel.
For instance, if your internal frame channel measures 300 millimetres by 400 millimetres, your outer mount dimensions must be calculated as 298 millimetres by 398 millimetres. Applying this systematic 2 millimetre reduction guarantees a smooth drop-in fit without needing to trim rough edges by hand during final assembly.
Verifying Frame Channel Depth Before Sizing
Measuring the depth of the internal channel confirms whether the rebate can accommodate the combined stack of glass, mount, artwork, and backing board. Standard moulding depths range from 10 millimetres to 15 millimetres, which easily accepts a single 1.4 millimetre card profile.
Thicker multi-layered mounts or double-board layouts require extra vertical clearance inside the structural recess. If your frame features a shallow channel of less than 8 millimetres, opting for heavy 3 millimetre mount card will leave insufficient space for the retaining points and backing panel. Always sum the total thickness of all 4 internal components before finalising your order. If the total stack height exceeds the channel depth, switch to a thinner conservation board to ensure the flexible spring clips sit flush against the rear moulding.
Accounting for mountboard thickness and bevel cut angles
Understanding How Board Thickness Alters Sightlines
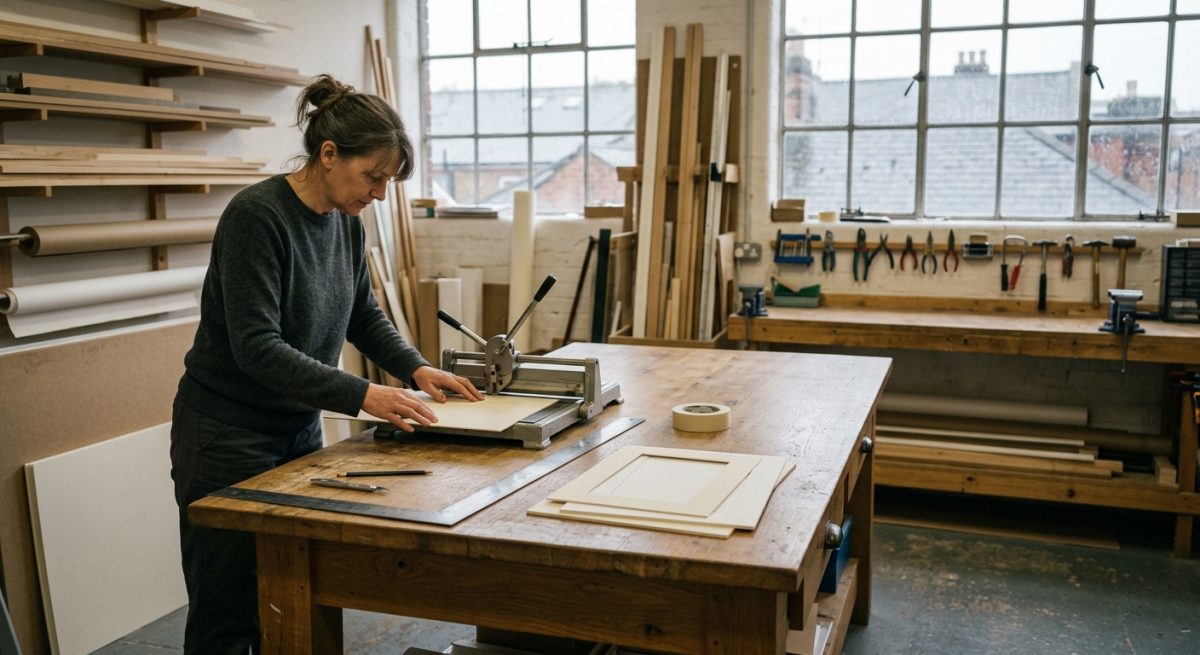
Standard Board Thickness typically ranges between 1.4 mm and 3 mm, directly influencing the depth of shadow cast onto your print. Thicker boards create a pronounced three-dimensional recession that alters the visual sightlines of the aperture edge.
When selecting a premium conservation board, the added depth creates a distinct drop between the glazing and the artwork. This structural gap prevents print emulsion from sticking to the glass, but it also casts a physical shadow along the internal border. If you use a 3 mm board instead of a standard 1.4 mm option, you must account for how the steeper sightlines obscure the extreme outer edges of your photograph. Framing delicate subjects with tight margins requires careful planning so that the shadow line does not swallow key design features.
Calculating the Opening Drop for Precision Bevel Cuts
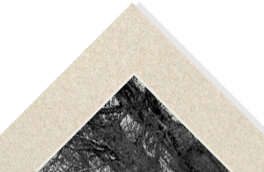
A standard 45-degree Bevel Cut extends the visible core inward beyond the surface mat edge by the exact measure of the board thickness. Framers must subtract this bevel overhang from their total window calculations to avoid unwanted image crop.
Because the cutter slices through the mountboard at an angled slope, the exposed cut edge creates a visible border around your photo. The visual width of this slope matches your chosen Board Thickness. For instance, a 1.4 mm board sliced at 45 degrees reveals 1.4 mm of the internal core around the entire perimeter. You must consider how the core colour interacts with your artwork. A bright white core creates a high-contrast frame around dark tones, while a grey or off-white core softens the transition on monochrome prints. If your photograph features fine detail near the edge, factor in this angled slope so the aperture opening does not obscure important photo elements.
Inspecting Mount Edge Projections Before Assembly
Performing a pre-assembly visual check ensures the angled cut does not expose unprinted border area or cover fine detail. A quick inspection under bright light prevents costly re-cuts and framing alignment errors.
To verify that your mount geometry works with your physical photograph, follow this 3-step quality checklist before securing the print with tape.
1. Lay your cut mount directly over the photograph on a flat, clean surface positioned under direct, bright light.
2. Check all 4 internal edges to verify that the bevel cut exposes precisely the intended photograph area without showing white photo paper borders.
3. Look at the assembly from a 45-degree side angle to ensure the inner core colour does not cast unwanted shadows across high-contrast subject matter.
Taking 2 minutes to double-check these measurements guarantees that your finished display looks perfectly proportioned and professionally executed.
Common sizing mistakes when ordering made to measure mounts online
Confusing External Frame Dimensions with Internal Aperture Sizes
Ordering a mount using frame dimensions instead of artwork size guarantees a loose, poorly fitted image. Buyers frequently confuse the total size of the frame with the required aperture cut-out, leading to costly reorders.
When ordering a made to measure mount online, you must supply 2 distinct sets of measurements. The outer dimension must match the internal size of your picture frame, whilst the inner dimension represents the window aperture through which your image is displayed. Using a standard metal measuring tape gives the most accurate reading for both areas. A common mistake during online measuring is entering the overall frame size as the picture aperture, which results in a mount board with no border area at all. To avoid this, always keep your frame measurements completely separate from your print measurements.
Mixing Metric Units and Centimetres vs Millimetres Errors
Inputting measurements in centimetres when an online form requests millimetres results in wildly inaccurate mount sizes. This simple unit conversion error creates window apertures that are either far too large or impossibly tiny for your print.
The debate surrounding centimetres vs millimetres comes down to digital precision in UK bespoke framing shops. Most web-based ordering tools require entry in millimetres to ensure accuracy down to a single unit. If you measure a print as 20 centimetres by 25 centimetres but type 20 by 25 into a millimetre input field, the factory will produce a mount measuring just 2 centimetres by 2.5 centimetres. Always double-check the required unit of measurement on the website interface before clicking submit. Switching between different measuring tools midway through a project also introduces small, avoidable errors that ruin the final aesthetic.
Forgetting the Essential Aperture Overlap
Cutting a mount opening to the exact size of your photo causes the print to fall through the window. A successful custom mount requires a 2 or 3 millimetre overlap on all 4 sides to secure the artwork neatly behind the board.
Without this slight reduction, securing the print with framing tape becomes nearly impossible, and grey backing boards may show through the edges. Follow this simple 3-step inspection routine to verify your aperture calculations before submitting your order.
1. Measure the physical height and width of your print using a rigid measuring tool.
2. Subtract 4 millimetres from both the total height and width to ensure a 2 millimetre overlap on every side.
3. Compare your adjusted dimensions against the online preview box to confirm that no important image details or signatures are cut off.
Taking 30 seconds to verify these figures eliminates 95% of common sizing mistakes. Proper planning guarantees a crisp visual border and protects your artwork for 10 to 20 years inside its frame.

Step by step process to measure prints and frames accurately
Measuring the External Frame and Mount Dimensions
Accurate external measurements ensure your picture mount fits perfectly inside the glass area of your display frame. You must always measure the rear rebate of the frame in Millimetres using a firm metal tape measure rather than a flexible fabric ruler.
To capture exact frame dimensions, follow this 3-step measurement routine.
1. Measure the exact width and height of the internal frame opening from the back rebate edge.
2. Deduct 2 Millimetres from both total figures to give your mount board sufficient clearance for natural expansion.
3. Record the final dimensions clearly to avoid confusion when ordering from specialist suppliers like Frames Express.
Standard frame sizes are built to house glass and backing boards cut to rigid tolerances. By reducing your overall mount size by 2 Millimetres, you prevent unsightly buckling caused by tight structural fits inside wood or aluminium mouldings.
Measuring the Artwork Size and Mount Aperture
Calculating the correct aperture size prevents your picture from slipping through the window opening or hiding important detail. You need to record the exact Artwork Size initially and then subtract a small margin so the mount overlaps the image edges.
When taking measurements of your print, lay the paper flat on a clean surface in a well-lit room. Measure the actual image area rather than the outer paper margin. To ensure the print rests securely behind the mount board without falling through the central cutout, the opening must be cut slightly smaller than the physical print.
For standard paper prints, deduct 4 millimetres to 6 millimetres from both the overall width and the height of your artwork size. This creates a 2 millimetre to 3 millimetre overlap along all 4 sides of the print. This intentional overlap compensates for minor positioning shifts during mounting and secures your print behind the window without obscuring key focal points of the picture.
Verifying Dimensions for Custom Frame Solutions
Double checking your calculations eliminates costly sizing mistakes when purchasing tailored framing components online. A quick verification routine guarantees that your mount border width remains balanced and aesthetically pleasing across all sides.
Checking border widths is a straightforward process once you have your external dimensions and window aperture figures. Subtract the window aperture width from the external mount width, then divide the remaining figure by 2 to determine your side border width. Repeat this calculation for the top and bottom borders to ensure the picture sits symmetrically within your Custom Frame setup.
Before submitting your final dimensions to Frames Express or an alternative framer, review all values 2 times to confirm you have not transposed width and height figures. Using Millimetres throughout the entire measuring process maintains absolute precision, prevents conversion errors, and guarantees a seamless fit for your picture presentation.
Frequently Asked Questions around Photo Mounts
What Is a Photo Mount Aperture?
A photo mount aperture is the precision-cut window inside the mountboard through which your picture is displayed. It is cut slightly smaller than your artwork to ensure the image sits neatly behind the card without falling through.
How Much Overlap Should a Photo Mount Have Over the Image?
A standard photo mount should overlap the edges of your picture by 3 mm to 5 mm on all 4 sides. This small allowance secures the print in place and prevents unsightly raw edges from showing around the opening.
If you do not leave at least 2 mm of overlap, your photograph risks slipping out of position inside the frame. Professional framers usually apply a 4 mm overlap to balance neat framing with maximum image display.
How Do You Measure a Frame for a New Photo Mount?
You measure a picture frame for a new mount by measuring the internal glass size from edge to edge rather than measuring the outer wooden border. The outer size of your photo mount must match these exact internal dimensions to fit flush inside the rebate.
Always use a rigid metal tape measure to gain an accurate figure in millimetres. Measuring the wooden frame backing or old glass gives you the most reliable 1-to-1 fit.
Why Is My Photo Mount Aperture Slightly Smaller Than My Print?
Your photo mount aperture is deliberately cut 5 mm smaller than your print size to hold the image securely behind the display opening. If the cutout was the exact size of your photo, the print would simply drop through the hole.
This intentional difference in size provides a safe lip for mounting tape to grab the back of the print. It also covers any uneven borders or handling marks along the very edges of your photo paper.
What Is the Standard Thickness for Picture Mountboard?
The standard thickness for a high-quality photo mountboard is 1.4 mm, which provides a clean bevel-cut edge without adding excessive bulk to your frame. Some conservation-grade or museum-style mounts use 2 mm to 3 mm thick board for a deeper visual effect.
A 1.4 mm card is easy to handle and fits seamlessly into almost all off-the-shelf display frames. Thicker boards of 2 mm or more require deeper frame rebates to accommodate the glass, board, and backing panel together.
How Do You Calculate the Outer Dimensions of a Custom Photo Mount?
You calculate the outer dimensions of a custom photo mount by measuring the precise inside window of your chosen picture frame. The outer width and height of the mountboard must equal the exact dimensions of the frame glass.
For example, if your frame glass measures 300 mm by 400 mm, your mountboard outer border must be cut to 300 mm by 400 mm. Your inner aperture is then calculated separately based on your photo size minus a 4 mm overlap.
Should You Measure Photo Mounts in Millimetres or Inches?
You should always measure photo mounts in millimetres to achieve maximum cutting precision and avoid rounding errors during framing. Imperial measurements like inches often lead to small inaccuracies that disrupt the fit of custom-made apertures.
Most British mount cutting machines operate strictly in metric units to 1 mm tolerances. Using millimetres eliminates confusion when calculating border widths and aperture positions across all 4 sides.
What Is the Best Way to Stop a Photo Slipping Behind the Mount?
The best way to stop a photo slipping behind the mount is to secure it along the top edge using specialist acid-free picture-framing tape. Creating a T-hinge with acid-free tape allows the paper to expand and contract naturally without sagging or warping over time.
Never use standard sticky tape or household masking tape, as these leave greasy residue and dry out quickly. Securing only the top edge prevents the photo from cockling when room temperatures fluctuate throughout the year.
Can You Cut a Photo Mount Aperture at Home with a Standard Knife?
You can cut a photo mount at home, but using a standard craft knife usually results in rough edges and uneven corner cuts. Achieving a professional 45-degree bevelled edge requires a specialised mount cutter equipped with a heavy-duty steel ruler and fresh blades.
A purpose-built mount cutter holds the blade at a steady angle to give crisp, clean lines without tearing the core of the card. If you use a basic utility knife, you will likely produce flat 90-degree cuts that look untidy.
What Colour Photo Mount Works Best for Black and White Photographs?
A bright-white or soft off-white photo mount generally works best for black and white photographs, as it highlights the contrast in the image. Light grey mountboards are also popular because they soften strong tonal shifts without distracting from dark shadow details.
Avoid using pure black mounts unless you want a dramatic gallery effect, as dark borders can make black and white prints appear dull. A clean white background keeps the focus entirely on the tonal range of your photograph.
Ready to Discuss Your Photo Mounts?
Get in touch with our specialists today for detailed site guidance, technical specifications, and a quotation tailored to your requirements.

