





How to Measure Your Stretched Artwork for Canvas Floater Frames
Article Overview
Canvas floater frames sit completely around the outside of your artwork, which means a tiny measuring slip will immediately show up in the final fit. This practical guide walks you through the exact steps to measure your stretched canvas accurately at home. You will learn how to get a crisp, gallery-ready finish on the very first try.
Picture this common studio headache. You have spent weeks painting a piece for an upcoming exhibition or a private client, and you quickly jot down the dimensions printed on the back of the wooden stretcher bars before ordering your frame. Standard frames have an inner lip that overlaps the edges of a picture by about 5mm, so they easily hide a small measuring error.
A floater frame offers no place to hide at all.
When those numbers are off by just 3mm, the whole visual effect falls apart. For example, if a wooden stretcher bar has bowed slightly outward in the middle, your painting might wedge tightly against one side of the moulding while leaving a crooked 8mm shadow gap on the opposite side. You end up losing valuable time and money ordering a replacement, and your client has to wait another week for their finished artwork.
Here at Picture Frames Express, we help artists and photographers avoid this exact frustration every day. This guide walks you through a reliable method for measuring width, height, and depth before you order bespoke framing online. Once you know what to look out for, ordering canvas floater frames becomes a quick and predictable part of your studio routine.
KEY TAKEAWAYS
- –Always measure the physical front and sides of your artwork with a metal tape measure because factory labels on canvas bars are often inaccurate.
- –Take 3 separate measurements across the width and height of your canvas, and use the largest figure to account for bowed wood or thick corner folds.
- –Add between 5mm and 10mm per side to your exact artwork dimensions if our online calculator asks for the internal frame size to create your shadow gap.
Need help with your Custom Frame?
Our team is ready to assist you in selecting the perfect bespoke floater frame for your latest masterpiece.
What tools do you need before you start?
Grabbing whatever ruler is lying at the bottom of your studio drawer is how most framing headaches begin. You don’t need a workshop full of expensive kit to size up your artwork for custom canvas floater frames, though a few basic items will keep your numbers reliable.
What is the best tape measure for framing artwork?
Dressmaker’s tapes belong in a sewing kit because fabric stretches over time and throws your numbers off. A retractable steel tape measure is the gold standard in our workshop at Picture Frames Express. The rigid blade stays straight across wide paintings so you can hook the metal end neatly over the edge of your canvas without the tape sagging in the middle.
Check that your tape clearly shows millimetres along one edge of the blade. Working in centimetres or inches tempts you to round up or down to the nearest whole number, and that tiny bit of guesswork will throw off the tight tolerances of a made-to-measure frame.
Plastic school rulers have a nasty habit of hiding a dead space of 2mm or 3mm before the zero mark actually starts. If you use one to check the depth of your wooden stretcher bars, you can easily misread the true profile of the canvas.
Simple items that make measuring easier
Gather these few extras before you touch the artwork.
- A clean, flat surface such as a dining table or workbench, covered with an old dust sheet or bubble wrap to protect your dry paint.
- A notepad and pen so you can write down every figure immediately in millimetres, labelled clearly with width, height, and depth.
- A wooden toothpick or a scrap of mountboard to help you gauge the height of any thick impasto paint that sits proud of the canvas surface.
- A second pair of hands if your stretched canvas is over 1 metre wide, because holding the metal hook flush on one side while reading the far end on your own often leads to a slipped tape.
Having your paper and pen right next to the table stops you trying to hold 3 different numbers in your head while walking back to your computer. It takes less than 2 minutes to set this space up, and your painting stays safe from accidental scratches while you work.
| Shadow Gap Per Side | Total Allowance To Add | Recommended Canvas Size | Visual Effect And Fit | Corner Fold Tolerance |
|---|---|---|---|---|
| 3mm | Add 6mm to width and height | Small canvases under 300mm | Snug modern fit with a subtle shadow line | Low forgiveness for bulky corners or out-of-square frames |
| 5mm | Add 10mm to width and height | Medium canvases from 300mm to 800mm | Classic gallery floating appearance | Accommodates standard folded canvas corners easily |
| 10mm | Add 20mm to width and height | Large canvases over 800mm | Bold shadow border that highlights painted canvas edges | High forgiveness for thick fabric folds and minor warping |
| 0mm (Exact canvas size) | Add 0mm to width and height | Not recommended for floater frames | No floating effect and risks damaging the painted edges | Canvas will likely jam against the inner frame walls |
The step by step guide to taking width, height, and depth
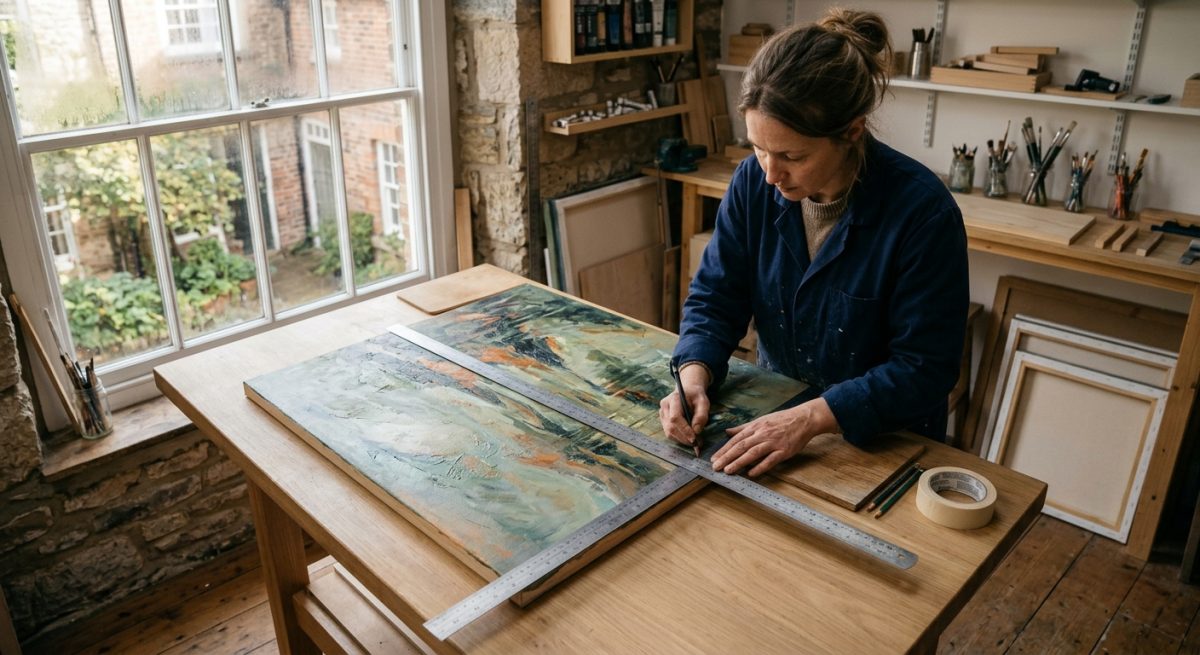
Place your artwork face up on your prepared table so you can read the front face directly. Measuring the back of the wooden stretcher bars will throw your numbers off because the fabric wraps over the timber and adds extra bulk.
How to measure canvas width and height across all 3 points
Hook the metal end of your tape over the far-left edge near the top corner and pull it straight across to the right. Write down that top canvas width in millimetres right away. Next, repeat that exact motion across the dead centre of the painting, and then take a third reading along the bottom edge where the corner folds sit.
Turn your tape 90 degrees to record the canvas height in the same 3 places, working from left to right. You will almost certainly end up with slightly different numbers for the middle and the corners. Always circle the largest width and the largest height on your notepad to use as your true artwork size.
Suppose you are framing a 500mm by 700mm seascape for an upcoming gallery show. Your tape might read 500mm across the middle because the tension of the priming pulled the pine bars inward, while the bottom edge measures 504mm across those thick folded hospital corners. Ordering from the 504mm figure guarantees the bottom corners will drop neatly into your canvas floater frames without scraping the inner walls.
Why should you check the canvas depth at every corner?
Stand the painting gently on its side or slide it carefully to the very edge of your workbench so the outer wall hangs clear of the table. Press the flat base of your tape against the back of the wooden bar and read the measurement right at the front painted face.
Check all 4 corners and the middle of the bars to find the true canvas depth. Hand-stretched linen and heavy acrylic gels often sit a few millimetres prouder at one end than the other. If you have built up heavy palette knife texture near the edges, lay your scrap of mountboard flat across the highest ridges so your tape catches that extra height too.
Circle the deepest measurement on your pad before you head over to the Picture Frames Express website. Picking a moulding profile that matches or slightly exceeds that largest depth figure stops the front of your canvas poking out past the protective lip of the frame.
How much space should you leave around a floating canvas?
That dark gap between the edge of your painting and the inner lip of the moulding is what gives canvas floater frames their signature gallery look. Framers call this the shadow gap or float space. Get the width right, and your artwork looks suspended in mid-air.
Most artists aim for a gap between 5mm and 10mm on each side. That means adding 10mm to 20mm in total to both your width and height when working out your internal frame dimensions.
What size shadow gap looks best for different artwork sizes?
The scale of your painting dictates how wide that breathing room needs to be so the visual border feels balanced. Match your canvas size to one of these standard gap widths to get the proportions spot on.
- Small studies under 300mm wide suit a tight 5mm gap per side because a wider space can swallow up delicate brushwork.
- Medium paintings between 300mm and 800mm look balanced with a 6mm to 8mm border, which gives you a crisp shadow line from across the room.
- Large statement pieces over 800mm need a generous 10mm allowance on each side so the dark recess still reads clearly next to heavy stretcher bars.
Personal taste plays a huge part here too. If you paint right around the tacking edges of your canvas and want buyers to see those colourful sides, lean towards a 10mm space so people can peek inside the recess.
How to enter your numbers when ordering online
Before you type any numbers into a website, check whether the framing company wants your exact artwork size or the finished inside measurement of the frame itself.
When you order from Picture Frames Express, pay close attention to what our online calculator asks for on the product page. If you are entering the internal size of the frame, you must add your chosen float space to your raw canvas measurements yourself.
Take a stretched portrait that measures 400mm wide by 500mm high as a working example. If you decide on a classic 6mm gap all the way around, you add 12mm to the width and 12mm to the height, which means you will order a frame with an internal size of 412mm by 512mm. Double-check your maths on your notepad before you head to the checkout.
Common measuring mistakes that ruin the floating effect
Even seasoned artists occasionally fall into a few classic traps when ordering frames online. Most of these errors happen because it is easy to forget how the physical hardware and wood behave once the piece sits inside its new home.
Why does my shadow gap look uneven on one side?
Timber stretcher bars frequently warp or twist as a painting dries, which leaves you with out of square artwork. If you only check the horizontal width and vertical height, a diamond-shaped canvas will sit crookedly inside a true 90-degree frame. Measure both diagonals from corner to corner so you can spot a skewed stretcher before you place your order.
Canvas wedges hammered into the inner corner slots also cause trouble when they stick out behind the wooden bars. Those little timber triangles can catch on the flat base of canvas floater frames, pushing your painting forward on one corner and ruining the level fit.
Overlooking proud hardware and paint drips on the edges
Traditional stretched canvases often have a row of side staples running right along the outer edges where the linen or cotton was pulled tight. Each metal crown adds 1mm or 2mm to the width of the piece, and heavy drips of acrylic or oil medium along the bottom edge do the exact same thing. You should run your palm gently along all 4 sides to feel for any hidden bumps, then include that extra bulk in your largest measurement.
What happens if you mix up imperial and metric units?
A stretched canvas sold in an art shop as 20 by 16 inches rarely measures an exact 508mm by 406mm in reality. Converting imperial estimates on a calculator usually leads to a tight squeeze or a lopsided gap because European and British timber bars are milled to metric sizes. Stick strictly to the millimetre scale on your tape from start to finish.
Checking the moulding depth against the thickness of your stretcher bars is the final step people often rush. If you pick a shallow profile for a deep-edge box canvas, the front of your painting will poke out past the protective lip of the frame. You can always message the team at Picture Frames Express if you are unsure whether a specific profile is deep enough to house your artwork safely.

How to fit your artwork once your custom frame arrives
Unpacking a bespoke moulding from Picture Frames Express is always an exciting moment, especially when you can finally see how the finish complements your brushwork. Before you grab your screwdriver, lay the empty frame face up on your covered table and gently lower your artwork inside to test the fit.
How to keep an even shadow gap on all 4 sides
Eyeballing a 5mm or 10mm gap around a large painting rarely works out well because the canvas shifts the moment you flip it over. You need a temporary wedge to hold the stretcher bars in the exact centre while you work from the back.
Grab a few items from around the studio to lock that border in place.
- Folded strips of cereal box card or offcuts of framer’s mountboard wedged tightly into all 4 corners.
- Plastic glazing packers or purpose-made spacers that match your chosen shadow gap width.
- A couple of wooden clothes pegs clipped onto the outer lip to stop the spacers dropping out when you turn the piece face down.
With those wedges holding everything steady, flip both the artwork and the frame face down onto your protective sheet so you can access the reverse.
How do you attach a canvas to a floater frame?
Canvas floater frames secure your painting from the back through the flat base of the L-shaped profile, leaving the decorative outer walls completely untouched. Check the back of your moulding for pre-drilled holes, which show you exactly where the metal hardware needs to go.
If your stretcher bars are made of dense pine, make a tiny starter indentation with a bradawl so the wood doesn’t split under pressure. Drive your fixing screws up through the back of the frame and straight into the solid timber of the canvas bars.
Start with the top and bottom centres before doing the corners, and double-check that the screw length is shorter than the combined depth of the frame base and your wooden bar. Nobody wants a sharp metal point poking through the painted linen on the front.
Once all the screws are snug, turn the piece face up and pull out your cardboard wedges. Attach your D-rings and hanging cord to the back of the heavier outer moulding so the frame takes the weight on the wall, and your painting is ready for the gallery.
Common questions about canvas floater frames
How do I attach my canvas to a floater frame?
Wood screws go straight up through the pre-drilled holes in the back of the frame and bite into the solid pine stretcher bars of your painting. Always lay the frame face down on a soft blanket first, then centre your artwork inside using small cardboard spacers to hold the shadow gap steady while you flip the whole thing over to screw it in.
What if my canvas is slightly shallower than the floater frame?
A canvas that sits 2mm or 3mm below the front edge of the frame is completely fine and actually protects the painted surface if the frame ever gets bumped in transit. When the gap is deeper than 5mm, you can easily raise the artwork by placing foam board shims or thin MDF packers between the back of the stretcher bars and the base of the frame before screwing it down.
Can I put a canvas board into a floater frame?
Flat canvas boards work brilliantly in shallow floater frames if you build up a hidden wooden cradle or glue a thick foam core riser to the back of the board first. That extra block gives the wood screws something solid to grip into and lifts the painted surface up so it sits flush with the front lip of the moulding.
Should a canvas sit flush with the front of a floater frame?
Flush alignment is the classic gallery look, so aim to pick a moulding where the internal rebate depth matches your canvas depth within 1mm or 2mm. Avoid letting the painted face stick out proud past the front of the wood. That exposed edge catches the light oddly from the side and leaves your corners vulnerable to knocks.
How do I measure a circular or oval canvas for a floater frame?
Standard rectangular floater frames still work very well for round canvases if you mount the circle onto a square backing board first, or you can order a bespoke circular moulding cut on a CNC router. Measure the diameter across the front face in 4 different directions to catch any warping in the curved ply, and give your framer the largest figure in millimetres.
What do I do if my stretched canvas has warped or twisted?
Twisted stretcher bars will always rock inside a flat frame, which means one corner of your painting will poke forward while the opposite corner sinks into the shadow gap. Dampening the back of the unprimed cotton slightly and leaving the canvas weighted flat on a table for 24 hours often pulls a mild warp straight before you take your final measurements.
Can you put glass in a canvas floater frame?
Glass never goes into a floater frame because the whole design relies on an open shadow gap around the outer edges of the artwork with no front lip to hold glazing in place. If a delicate mixed-media piece on canvas needs protection behind acrylic or glass, a deep box frame with an internal spacer is the right profile to order instead.
What happens if staples are sticking out on the sides of my canvas?
Side staples add 2mm to 3mm of jagged metal bulk that will scratch the inside walls of your moulding and throw your shadow gap off centre. Include the full head of the highest staple in your width and height figures, and paint the metal the same dark colour as the inner frame channel so it disappears into the shadow.
Ready to Order Your Bespoke Canvas Floater Frame?
Use your precise measurements to order your custom frame online today. We ensure a high-quality finish for every piece of artwork you send to our workshop.

