




How to Plan and Measure a Staircase Gallery Wall
Article Overview
Planning a balanced gallery wall along a rising staircase requires precise geometrical calculations rather than mere aesthetic guesswork. This comprehensive guide outlines the technical framework needed to measure steep incline angles, secure adequate clearance, and arrange picture frames with mathematical symmetry. Property owners must establish 1 clear vertical baseline using a reliable plumb line while mapping out the exact tread line to guarantee that artwork mirrors the natural incline of the steps. In addition, calculating proper wall clearance prevents physical obstructions and protects delicate frames from accidental impact in high-traffic domestic corridors. By applying 2 quick tape measurements alongside modern laser levels, you can transform an awkward vertical expanse into a structured feature wall. Following these 5 standardised measurement steps ensures your artwork hangs safely, aligns perfectly with existing architectural features, and creates a clean layout that withstands daily household movement across all 2 storeys.
Measuring a diagonal wall space presents unique technical friction because standard horizontal hanging methods fail entirely on a steep gradient. Property owners and interior decorators often struggle to establish uniform frame spacing without an accurate reference point relative to the actual incline of the individual steps.
Miscalculating the angle leads to crooked frame layouts, unsightly plasterboard damage, and repeated drill holes that inflate internal redecoration costs. Under UK Building Regulations Approved Document K, domestic stairs feature a maximum staircase pitch of 42 degrees, meaning an angular measurement error of just 2 degrees creates glaring visual misalignment across a 3 metre display.
Utilising a weighted plumb line alongside a chalk string snapped parallel to the tread line resolves these complex geometry challenges cleanly and cost-effectively. This systematic approach establishes
Need Specialist Advice on Photo Frames?
Speak to our technical team today for tailored specifications, regulations compliance, and practical support.
Calculating Photo Frame Spacing along an Incline
Establishing the Base Centre Line
Establishing a consistent datum line parallel to the stair rake ensures your artwork sits at a comfortable eye level. Projecting a line 150 cm vertically from the nose of each tread creates the central spine for the entire layout.
To set this datum up correctly, measure 150 cm upwards from the front edge of the bottom step and 1 top step. Stretch low-tack masking tape or a string line between these 2 points to establish the primary centre line along the incline. A digital laser level placed on the staircase steps helps verify that your line remains 100% straight across the entire run. This imaginary axis represents the visual heart of your display, mirroring the exact angle of your staircase. Marking this reference point prevents the entire display from looking lopsided or drifting away from the pitch of the handrail as you mount each piece.
Calculating Equal Frame Spacing
Uniform spacing along an angled pitch requires measuring distances along the incline rather than taking horizontal floor measurements. Dividing the total diagonal length by the number of frames plus gaps guarantees precise alignment.
When laying out a rigid gallery wall grid along an incline, horizontal distances compress due to the angle of the stairs. Calculating measurements directly along the diagonal angle avoids compounding errors. To calculate accurate frame spacing along the slope, follow this simple 3-step measuring routine.
1. Measure the total length of your string line from the top tread point down to the bottom tread point in millimetres using a 5-metre tape measure.
2. Subtract the combined diagonal width of all your picture frames from that total overall length to calculate your remaining wall space.
3. Divide this remaining figure by the total number of frames plus 1 to determine the exact gap needed between each frame edge.
Maintaining a consistent gap of 50 mm to 75 mm between borders usually produces the crispest result along a standard residential flight.
Accommodating Made to Measure Frames
Varying frame dimensions require adjusting individual anchor points while preserving uniform edge-to-edge gaps along the pitch. Calculating offsets from the central axis ensures bespoke sizes integrate seamlessly without disrupting the visual rhythm.
Bespoke layout schemes often incorporate made to measure frames to house unique artwork, vintage prints, or family photos. When combining asymmetrical sizes, calculate the anchor point for each piece individually rather than hanging every picture from a uniform hook height. Measure the overall height of the specific frame, divide it by 2, and offset the picture hook from your primary datum line. As long as the physical clearance between outer moulding edges remains fixed at 50 mm, the entire collection maintains visual equilibrium regardless of varying frame heights or widths.
Choosing Custom Photo Frames and Mounts for Stairwells
Selecting Durable Frame Moulding Profiles
Selecting the right frame moulding profile ensures your artwork remains secure without protruding too far into narrow transit zones. Slender wood or metallic frames with a depth of under 30 mm offer a streamlined finish that minimises collision risks on tight turns.
When you order Custom Picture Frames for a staircase, you must balance physical durability with visual weight. High-traffic domestic zones subject wall displays to constant vibration, drafts, and occasional bumps from passing people. Slimline oak, ash, or aluminium frames maintain clean sightlines along the rising angle of the dado rail. If you prefer heavier aesthetic styles, limit deeper profiles to lower steps where the clearance width exceeds 900 mm. Ensure that timber mouldings feature robust corner splines or double-pinned joints to handle the lateral stress of angled hanging systems.
Specifying Lightweight Acrylic Glazing for Stairways
Specifying acrylic glazing provides exceptional shatter resistance and substantial weight reduction compared to standard float glass on sloping walls. Non-reflective acrylic sheets also cut down harsh glares from overhead pendant lights and adjacent landing windows.
Heavy glass panels pose a significant safety hazard if knocked loose on a stair run. Shatterproof acrylic reduces total frame weight by up to 50%, making heavy-duty wall anchors unnecessary for mid-sized displays. Follow this simple 3-step inspection routine before securing your glazing into the frame.
1. Peel back 50 mm of protective film around the edges to check for surface scratches or debris.
2. Wipe both sides with an anti-static microfibre cloth to clear fine dust particles before fitting.
3. Verify that the sheet sits completely flat against the rebate without pinching the corners.
Selecting anti-UV acrylic options will also shield your photographs from fading when exposed to direct sunlight from roof lights or window wells over 10 to 15 years.
Proportioning Conservation Grade Mount Board
Choosing acid-free Mount Board creates a protective air gap between the photo print and the front glazing sheet. Generous mount margins also visually balance irregularly spaced prints along a rising diagonal stair line.
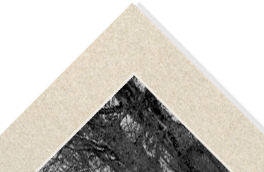
A minimum mount width of 50 mm gives small to mid-sized photos adequate breathing room on expansive stair walls. For large statement frames, increase this border to 75 mm or 100 mm to draw the eye inward. Conservation-grade board crafted from 100% alpha-cellulose prevents yellowing and chemical degradation of original images over a 20-year or 30-year span. Choosing bright white or soft grey mounts creates a clean visual anchor, unifying mismatched image tones across the entire installation.
Creating Paper Templates for Staircase Frame Layouts
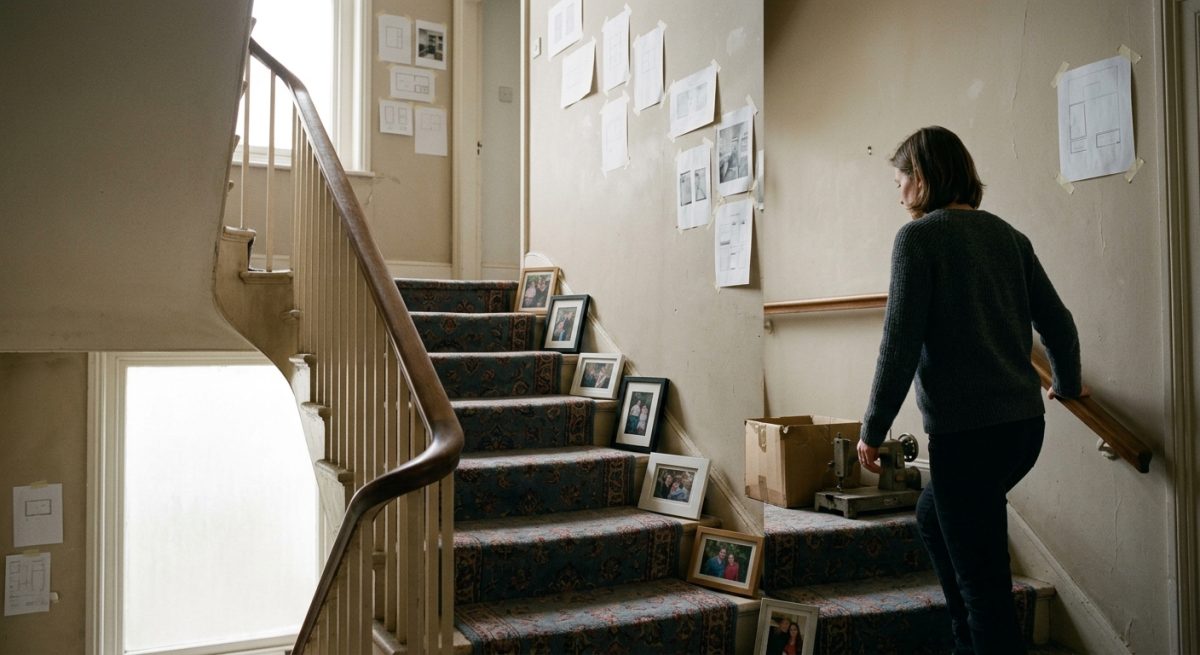
Before driving 1 picture hook into the plasterboard, mocking up your arrangement with physical guides prevents costly errors. Creating full-size paper templates is the most effective method for visualising frame geometry against the awkward angles of a stairwell.
Drafting Frame Outlines on Lining Paper
Cutting exact templates from lining paper allows you to experiment with gallery wall configurations without damaging your paintwork. This essential stage of layout planning reveals how proportions interact along the inclined rake of the staircase.
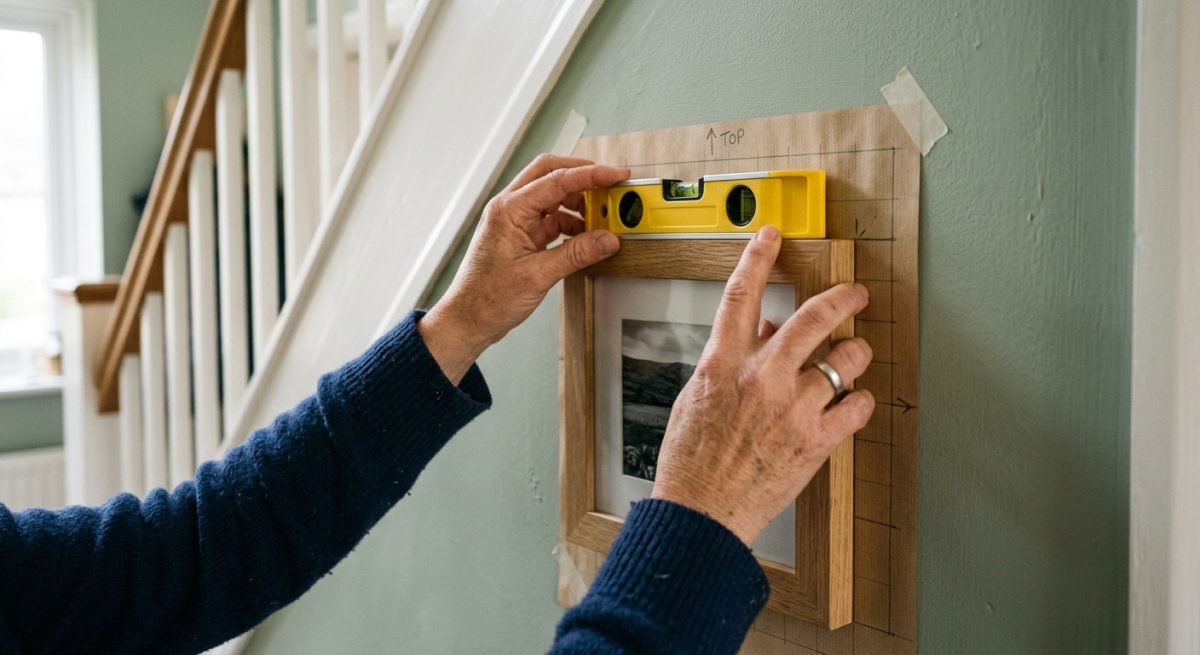
Place each picture frame face down on a roll of 1200-grade lining paper or butcher paper. Trace carefully around the outer perimeter of the moulding using a sharp pencil. Cut around the outline with heavy-duty scissors, ensuring the edges are completely square. Mark the frame orientation, hanging direction, and picture details directly on the front of each cutout to streamline your workflow.
Mapping the Staircase Rake and Spacing
A spirit level ensures your paper templates maintain a true vertical alignment despite the diagonal pitch of the stairs. Maintaining a uniform distance of 50 mm to 100 mm between frames preserves a clean, balanced visual flow.
Setting up paper templates on an inclined wall requires a systematic installation sequence to maintain accurate spacing. Follow this 3-step process to position your paper mockups correctly.
1. Measure up 1500 mm from the stair nosing at 3 tread locations to mark your central sightline.
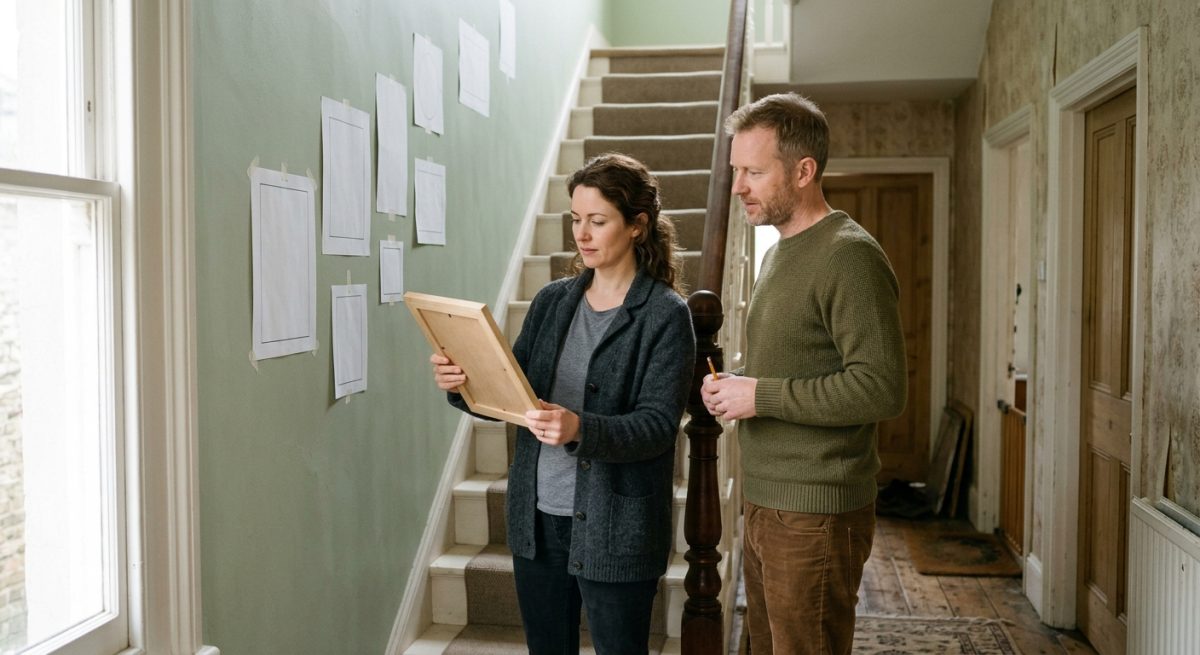
2. Attach each cutout to the wall using Low Tack Tape, adjusting the gaps until the balance feels correct.
3. Verify every vertical edge with a 600 mm spirit level before pressing the tape down firmly.
Step back to the bottom of the flight to evaluate the composition. Make minor adjustments to the low tack tape until the overall geometric structure feels balanced against the rising steps.
Marking Wall Fixings Through the Template
Transferring fixing points directly through the paper template guarantees that picture hooks align perfectly with your frame hardware. Punching small guide holes directly through the paper saves time and eliminates measurement errors during final installation.
Turn each frame over to measure the distance from the top edge of the frame to the hanging bracket or wire. Measure that exact distance down from the top edge of the paper template on your wall. Mark this spot with a pencil, then push a bradawl or small nail directly through the paper into the plaster. Once all fixings are marked, tear away the template paper and install your wall anchors with 100% precision.
Hanging Photo Frames Securely on a Slope
Fixing Hardware for Inclined Surfaces
Securing artwork on a sloped staircase wall requires specialised fixings that resist downward gravitational pull and diagonal force. Selecting suitable wall anchors paired with heavy duty hooks ensures your frames remain firmly aligned parallel to the rake of your stairs. Standard picture pins often creep downwards over time when driven into an inclined surface. To achieve 100% mechanical stability, you must match the wall substrate, whether hollow plasterboard or solid brickwork, with robust mechanical fixings that offer high shear strength. Using 2 fixings per frame rather than 1 central point prevents rotational slip along the slope. This balanced hanging strategy spreads the total load across 2 distinct anchor points, protecting decorative frames valued from £10 to over £250 from sudden falls. High-grade steel brackets rated for 15 kg to 30 kg offer the necessary margin of safety on steep 42-degree inclines.
Anchoring Frames Against Footfall Vibrations
Heavy footfall on stair treads transmits impact energy directly through internal wall studs, causing loosely hung picture frames to shift or bounce. Installing locking wall hardware provides superior vibration resistance to keep every picture frame permanently locked in position regardless of daily household activity. When occupants travel up and down 1 or 2 flights of stairs, the generated kinetic shocks shake adjacent wall panels continuously. Simple picture wire suspended from 1 nail lacks the grip needed for these active areas. Specialist T-screw locks or heavy-gauge spring clips fasten both the top edge and bottom rail of the frame flush against the wall surface. This dual-anchor arrangement stops lateral movement completely, eliminates weekly manual adjustments, and preserves wall finishes over a 10 to 20-year operational life.
Sequential Mounting Routine for Inclined Frames
Precision mounting along a sloped baseline relies on a systematic installation procedure tailored to the pitch of your staircase. Following an accurate sequence prevents misaligned picture frames and avoids tedious repair work on damaged plaster.
1. Mark a continuous baseline exactly 150 cm above the stair nosings using a digital line laser set to the incline angle.
2. Drill clean pilot holes into the wall substrate and drive high-expansion wall anchors into your 2 marked fixing points per frame.
3. Mount the display pieces onto heavy duty hooks and engage the bottom securing clips to guarantee long-term vibration resistance.
Frequently Asked Questions around Photo Frames
What Is the Ideal Distance Between Photo Frames on a Staircase Wall?
The ideal distance between photo frames on a staircase wall is 5 cm to 8 cm. Maintaining this consistent spacing prevents the display from feeling cluttered while keeping the pictures visually connected.
For smaller photo frames, stick to a 5 cm gap, whereas larger frames benefit from an 8 cm gap to maintain correct visual balance.
How High Above the Stairs Should Photo Frames Be Hung?
The centre of your photo frames should sit between 145 cm and 155 cm above the staircase steps. This places the artwork at eye level for the average adult walking along the incline.
You should measure this vertical height consistently from the centre of each step tread to ensure your gallery wall follows a smooth line parallel to the slope.
Should All Photo Frames on a Staircase Gallery Wall Be the Same Size?
You do not need to use photo frames of the same size, but keeping a consistent frame style or colour helps create a unified layout. Mixing 3 to 4 different frame sizes often adds visual interest along a long staircase wall.
If you choose varied sizes, place 1 or 2 larger focal-point frames in the middle section and arrange smaller photo frames around them to maintain balance.
Which Type of Fixings Work Best for Securing Heavy Photo Frames on an Incline?
Heavy-duty wall anchors and picture-hanging hooks with 2 pins work best for securing heavy photo frames on a staircase wall. Because staircases experience constant vibration from foot traffic, standard adhesive strips may fail over time.
For plasterboard walls, use screw-in hollow-wall anchors that support at least 10 kg per frame to prevent any risk of falling pictures.
How Do You Measure the Slope Line for Hanging Photo Frames?
You measure the slope line by marking a point 150 cm above the bottom step and another point 150 cm above the top step, then connecting them with a chalk line or laser level. This guide line runs parallel to your stairs and serves as the baseline for aligning your photo frames.
Once this angled reference line is set, you can position the lower edge or centre of each frame along the path for a high-quality finish.
Is Acrylic Safety Glass Better Than Real Glass for Staircase Photo Frames?
Acrylic safety glass is significantly better than real glass for staircase photo frames due to safety considerations. Staircases are high-traffic zones where an accidental knock could send a frame down the steps.
Lightweight acrylic glazing provides 100% shatterproof protection while reducing the overall weight of large photo frames, making them safer to hang on high walls.
How Many Photo Frames Are Needed for a Standard UK Staircase?
A standard UK staircase typically requires between 8 and 15 photo frames depending on their dimensions. A set of 10 medium-sized frames measuring 20 cm by 25 cm usually fills a standard 13-step wall without crowding the space.
Before buying frames, test your layout on the floor or tape paper cut-outs directly to the wall to calculate the exact number required.
What Frame Colour Works Best on a Neutral Staircase Wall?
Black, oak, or dark grey photo frames work best on a neutral staircase wall by providing clear definition against light background paint. High-contrast frame mouldings draw the eye to the pictures and create a sharp, architectural outline along the stairs.
Alternatively, matching white frames on a white wall offer a subtle, minimalist look, though they require thicker mounts to keep the photographs visible.
How Can You Keep Photo Frames Level on a Sloped Staircase Wall?
You can keep photo frames level by using a spirit level on top of each frame during installation and securing the bottom corners with adhesive tack. Even though the gallery wall follows a sloped line, each individual frame must remain horizontal.
Adding 2 small rubber bumpers or adhesive pads to the bottom back corners of each frame prevents them from shifting when people walk up and down the steps.
Should You Plan Your Photo Frame Layout on Paper Before Drilling?
You should always plan your photo frame layout on paper or using paper cut-outs before drilling any holes into the wall. Cutting paper templates to the exact size of each frame lets you arrange and re-position your scheme using low-tack painter’s tape.
This preparation step saves time, prevents unnecessary plaster repairs, and allows you to mark nail positions directly onto the paper templates with 100% accuracy.
Ready to Discuss Your Photo Frames?
Get in touch with our specialists today for detailed site guidance, technical specifications, and a quotation tailored to your requirements.

