


The Art of Capturing Light - Basics of Photography Series Part 6
So the time of year has come when Christmas lights line the streets, days get darker and the world takes on a new glow. With this time of year offering a new challenge in lighting for photographers we thought we would give you some top tips to capture the illuminations which come with this time of year including capturing in the golden hour.
So it’s time to grab your jackets, wrap up warm and take a stroll to begin experimenting with light.
(Don’t speak the photography settings lingo? – Take a read of our jargon buster.)

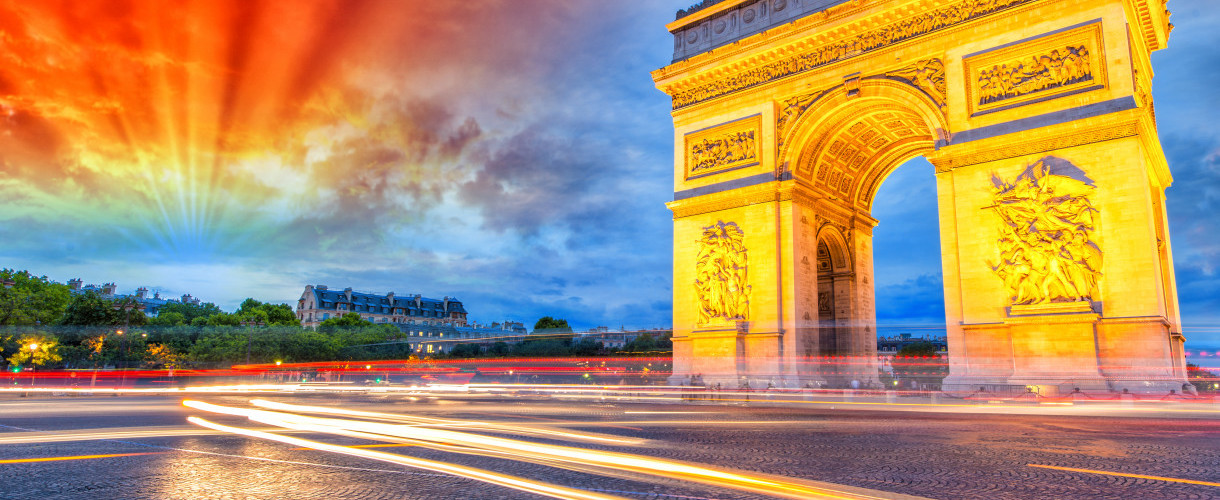
Light Trails
Light trails are a capturing effect photographers can use to photograph light as a trail as it moves past the lens. They are particularly effective for photographing cities at night and passing traffic. Light trails aren’t easy to capture, particularly as you have to be fast and find your optimum settings via trial and error, just remember you do need passing light for a light trail to work.
*Top Tip : Photograph traffic travelling in two directions in order to get different coloured lights captured in your image.
Recommended Settings:
- Aperture- if you use your camera in shutter-priority mode it will automatically pick the best aperture for the lighting in your image. In order to best capture light trails however you should look to set your aperture depending upon the amount of light trails you wish to pass through your picture. (The longer the aperture, the larger the amount of light trails- traffic, which has a chance to pass through your shot.)
- ISO- pick the lowest ISO available which lowers the shutter speed in order to capture more light.
- Shutter speed- as a general rule pick a shutter speed between 6 and 30 seconds.
Light trails are great fun and a good way to capture movement in an image, its also a great way to improve your quick snapping skills.

Light Bursts
A great way to capture stationary lights in your images is by shooting with a small aperture (high f number) which creates a starburst effect in your shot.

Festive Christmas Lights
With so many decorations which will soon be lining our streets for Christmas, it’s hard not to want to capture the festive spirit and amazing effect of the lights in a photograph. The great thing about Christmas lights is that they are stationary, however it can be hard to work out how to photograph them to create a true impression of the glow they offer aswell as colour and the winter sky.
Top Tip: Have a wander around your neighbourhood and take a look at the different lights people have on display to experiment with your photography, different colours, angles and shapes which you can capture.
Recommended Settings:
- Aperture- lowest aperture possible (high f-number)
- ISO- Set your ISO between 400 and 800
- Shutter Speed- set shutter speed low, and experiment – remember than with a lower shutter speed you will need to you a tripod to reduce shaking in your shots.
Top Tip: Get the winter sky into your frame to truly appreciate the night sky, atmosphere and the glow of the illuminations.

Nature’s Lights – Aurora Borealis
The Northern Lights, or the Aurora Borealis is not only beautiful but an experience to see. Capturing this moment/memory however can be hard due to the constant movement of the lights. However with the following settings you should be able to get your shot…
Recommended Settings:
- Aperture- Adjust aperture to widest your camera will allow.
- ISO- between ISO 400 & ISO1000
- Shutter Speed- Set your shutter speed as slow as your camera will allow (most likely around 30 secs) and adjust according to exposure.
Top Tip: Don’t forget to get some of your surrounding scenery into the picture as this helps to add context to your memory, and helps viewers appreciate just what they are seeing- not just lights in the sky

